Saturday, December 1, 2012

Moving a Shark


Good day, fellow humans and extraterrestrial eavesdroppers. A short post about a unique opportunity I had this week, namely, transporting a brown-banded bamboo shark (Chiloscyllium punctatum) about 150 miles by truck and good luck.

Juveniles BBBs have striking brown and cream markings.

The roughly 3 foot long female had been in a small holding tank for over a year. She'd been removed from a very large tank containing about a bajillion reef fishes, the number of which she'd been steadily reducing during her night-time huntabouts. She needed a new home and we found one for her at a small, for-profit, public aquarium opening soon in a neighboring city. Thus, the decision was made to transport her there post haste. First, she had to be removed from her holding tank, transported down some pretty sketchy stairs and out into a waiting holding tank on the back of a flatbed pick-up. I wondered if we'd be anesthetizing her to some degree to make her easier to handle but that was not the case. As it turned out, with the right tools and experience she was pretty easy to move. One of the key tools was this handy-dandy fish hammock.

This cool fish hammock made getting the animal out of the holding tank and carrying her down very steep stairs a breeze.
The vinyl hammock has a very smooth interior, perfect for not damaging the delicate skin of fishes. It's about 3 feet long and 2 feet deep. It holds water but has holes punched in the side about half way down so as to allow some water to drain out, thereby lightening the load. The carrying poles are made of PVC with safety caps on the ends. They are light-weight and strong, perfect for carrying a fish out of water or, in a pinch, an unsuspecting missionary back to the ol' cooking fire. We used a large fish net to direct the shark into this hammock by lifting and guiding her head. It's funny how much larger fish can look in the water. I swore this was a 5 foot, 80 pound animal from the few times I'd viewed her from above in her holding tank. As it turns out, 3 feet and about 25 pounds was more like it.

The holding tank on the back of the truck was made of insulated plastic, like a giant beer cooler or, in this case, fish warmer. The tank had been filled with 76 F filtered sea-water. This was the same water that had been flowing into her holding tank so no worries about acclimation. We filled 4 1-gallon jugs with boiling water and floated them in the tank with the shark to help keep the water temperature from dropping over our roughly 2 hour drive. We also placed 4 partially inflated large plastic garbage bags in the container which, when pressed down by the lid, would help keep the water (and the shark) from sloshing around. This all worked awesome except we didn't secure the lid properly before we took off. Doh! We had a temp/PH probe in the water which was connected to a monitor in the cab by a long wire. Early on, we wanted to check the status but when we looked at the monitor is said "Calibration Necessary." Hmmmm, curious. Eventually, one of our team members looked back and saw the lid had blown off our container, at the same time, shearing off the probe, hence no read-out. We were calm but mildly horrified, imagining that we'd fully lost the lid, having it land on the road behind us...or worse. Thankfully, when we pulled over and got out, the lid was there along with the probe. Regrettably, the plastic bags were who-knows-where. Unfortunate from a pollution perspective but not such a terrible outcome considering. We got everything back in order, sans the probe, and continued on our journey. The lesson: double, nay, triple-check the security of any load.

The journey was subsequently uneventful and we arrived at our destination right on time with water still at exactly 76 F and a healthy animal ready for new, more spacious digs. We were greeted by the owner of the aquarium as well as the Director of Husbandry. After a short tour of their cool new facility, we came out to see the shark. They were a little surprised at her size, having expected a somewhat smaller animal, but they were very impressed with her immaculate condition. They took a water sample and PH/salinity/temperature parameters matched their holding tank so out of the truck and into the tank she went. Her eventual home will be a large, sandy-bottomed exhibit with other sharks and rays, perfect for a small, benthic shark like our bamboo.

Our adult female bamboo shark looked a lot like this one. The banding pattern is much subdued or fully lost in the adult animal. This photo from "Shipwrecks and Sharks."

We said our see-ya's and off we went. One fill-up, one rest stop and 3 sandwiches later, we were back, feeling good about giving this animal a new and better home.

Cheers, Paul


Sunday, November 25, 2012

Mycobacterium marinum

Good day, gentle reader. In this short post, I will recap a simple medical procedure that I assisted with last week. I was not able to photograph the animal or tools so words will have to suffice.

We have a snow-flake moray eel (Echidna nebulosa) that has been in pretty bad shape for some time. It has been residing in a very large display of many thousands of gallons along with myriad other reef fishes. The animal has lumps and lesions along its dorsal surface, especially toward the head. The animal has been treated with antibiotics on several occasions to no avail. It has also had to be force fed with a tube on and off throughout its nearly year-long illness. The exact pathogen is not know though we suspect "fish tuberculosis" caused by Mycobacterium marinum, symptoms of which include raised bumps and lesions. This bacteria can infect fish but it can also infect aquarists. For this reason, it was very important to glove-up for the procedure.

The animal is a mature individual of nearly 3 ft in length with a body depth of about 4 in. It had been caught out of the display by divers and had been residing in a large holding tank for about 5 weeks during which time it had not eaten. The goal of the procedure was to obtain a sample from inside one of the large lumps and send it to the lab for positive ID. If in fact it turned out to be Mycobacterium marinum, the eel would have to be euthanized as there is no treatment.

Even though the eel's health was severely compromised, it was still a large and powerful animal capable of inflicting a painful bite. To get the sample, we had to anesthetize the animal with MS 222 (Tricaine Methanesulfonate) which is commonly used for this purpose. Too much MS 222 would mean death for the eel. Too little would mean we were in danger of being bitten. Catching the animal, even in a holding tank with no decor, was a challenge but we finally prevailed. We then introduced the eel into the tub of anesthetic and waited.

After about 5 minutes, the eel was docile enough to be handled. I was in charge of holding the animal while my partner got the sample. Getting a grip on a slippery eel isn't easy. We used paper towels in our gloved hands to cradle the animal. Procuring said sample involved sterilizing the area with an alcohol wipe and then making a small incision in one of the lumps with a scalpel. Then a sterile swab would be inserted into the incision to collect a sample and then placed in a sterile tube to send to the lab. When my partner applied the alcohol, it definitely got the eel's attention and the animal quickly slithered out of my hands. Luckily it didn't turn around and bite me. We realized it needed a bit more time in the MS 222 bath before we could do what we needed to do.

Another 5 minutes did the trick and we were off and running. Again, I held the animal while the site was cleaned, incision made and sample taken. It all came off without a hitch. We're now waiting to hear from the lab. As mentioned, if it is M. marinum, the animal will be euthanized. If it's something else, we will treat accordingly.

It is sad to see such a glorious animal in this condition but I was surprised at how matter-of-factly I handled the situation. I guess having worked with fish for a while now, I'm a bit hardened to the ups and downs of life in salt water. I was also surprised at the power of this animal having never handled a fish of this size. It was like one long muscle. Finally, I was struck by the beauty of the eel's markings. Held partly out of the water, the patterns were extremely clear and vibrant. Even in its severely compromised state, this animal was absolutely gorgeous.

Hopefully, we'll get some good news, but we pretty much expect the worst.

Thanks for reading and may you and your fish be ever free of Mycobacterium marinum.

Best, Paul

Update: The lab results came back positive for "Myco." Sadly, we had to euthanize the animal using the same MS 222 that we used as an anesthetic only at a higher concentration.

Wednesday, November 14, 2012

Plumbing with PVC


Plumbing with PVC

Hello and welcome again to Aquarium Animals. In this installment, we'll be focusing not on an animal or animal group but instead on a means and material by which we may sustain marine organisms in captivity. And that means and material is Polyvinyl Chloride, commonly known as PVC! Wow. What can't you do with PVC? In this case the application was the final pieces of hard plumbing in a make-up water treatment system for a large number of tanks. This system functions to transform raw, temperate sea water into water suitable for tropical reef inhabitants. The system involves running the water through mechanical filtration, ozone injection, further mechanical filtration, activated carbon, protein fractionation (is that a word?) and boilerization (definitely not a word.) The system had been in place for sometime and was fully functional but a number of pieces were soft plumbed or otherwise gerry-rigged. We set about replacing these components with hard-plumbed PVC. Time was somewhat of the essence as we couldn't do any water changes or topping off on our display or holding tanks until the project was completed. In preparation, we did very large water changes on all systems. The intention was to complete the project in two days but it took the better part of three. But we got it done!

I had never worked with PVC before so there was quite a steep learning curve. But I was working with a team of very experienced aquarists who brought tons of know-how to bear on the project. This is a documentation of the basics of the project and what I learned about plumbing marine systems with PVC. I look forward to my next opportunity to work with this amazing material.

What is PVC?
PVC is basically plastic pipe. It is available in a number of "Schedules" or strengths which are rated for various levels of water pressure. For this system and for most marine aquarium applications, Schedule 40 is what is used. We also used some Schedule 80 pieces, especially valves. There's nothing terribly mysterious about the various components but there are a lot of them; pipe, reducers, valves, nipples, couplers and others with connections between them being either "slip" or "threaded". Slip connections slip into each other and must be glued. Threaded connections screw into each other with the threads being wrapped in Teflon tape to prevent leakage, the arch nemesis of any plumber. We had the luxury of a vast array of component pieces available to us on site.


Not too many people have this many valves and fittings available on site. Keeping them organized is absolutely key.

From this stock, we selected a number of common pieces to bring to the work area. But, of course, we made about a billion trips back downstairs for more shapes and sizes.


Trays of common fittings in were kept in the work area for easy access.

We also had plenty o' pipe, in this case 1 1/2" schedule 40 was used for most of the project with some 2" used here and there.

Tools
Now, let's talk about some of the basic tools used to plumb with PVC. Mostly, the tools are recognizable to any home fix-it person; mallets, channel-locks, tape measure and Teflon tape.


These basic tools are likely recognizable to most.
Additional tools specific to this application were also used. This battery-powered PVC cutter was extra awesome.


We speculated on any number of organized crime applications for this little red number.
For cutting in closer quarters, a textured cable with little handles did a fantastic job. Taking one handle in each hand and running the cable back and forth around the pipe made a nice clean cut quickly and with minimal exertion.


This tool is great for removing pipe from an existing system in tight spaces.

The battery powered cutter is great but if you try to use it to remove just a small amount from the end of a pipe, the pipe can easily shatter. If you need to remove 1" or less, use this special PVC hand saw instead.


It takes more effort but this hand saw is much safer for removing just a small amount from the end of a piece of pipe. Old school.

And we already mentioned Teflon tape and glue which we'll talk about more in the "plumbing" section. Now let's turn our attention to planning the project.

Planning
Like any construction project, proper planning is super important. You need to know what you want to accomplish in basic terms, i.e., connect component A to component B with a shut-off valve in between. And you should know the approximate dimensions so that you can have enough pipe and fittings on hand. For this project, we had a basic sketch of the system on the wall. It was not to scale and it was not representative of the actual layout. It simply showed the entire system in a linear format even though the final product was more like a spider web than a line. It showed the main components (Ozone injector, foam fractionator, etc.) and the order in which they were to be connected. It did not show pipe, connector or valve sizes or any specific lay-out. That was all determined during the project based primarily on the physical space itself, the routing of the pipes and, to a lesser extent, the availability of fittings. One could certainly have a fully spec'd CAD drawing with everything predetermined for a project like this. A plan such as this could help with costing the project or with conveying the aquarist's wishes to a fabrication team. In this case, the aquarists themselves were doing the plumbing and the decision was made to design on the fly as the system was being built. This design flexibility proved very sensible in this case and led to an outstanding final product. A more specific plan would have been more of a pain than a help. Most of the details were in the minds of those building the system, not on paper.

Plumbing
At any given time during the project, a team of 2-5 people were hard at work. Generally, two or three people doing the design/fabrication, one person cutting pipe and one person running 7 1/2 miles down 400 flights of stairs every 96 seconds for additional fittings. Good times.

We started by removing the funky sections we were there to replace and setting all that aside for possible future use. Then we did what any sensible person would do, we started at the beginning. As mentioned, there was no exact plan but more of a shared "intention" guiding our work. Plumbing with PVC is logical, pure and simple. But there is a creative element to laying it out that boarders on the artistic. I was proud to work with a team that was focused on creating a highly functional system that was also clean, neat and professional looking. This was not a group of Sharpie wielding Neanderthals intent on covering the earth and everything on it with blue glue. "Artisans" is the term I would use to describe them.

It's pretty much like Tinker-Toys with water flowing through them. During the fabrication process, a number of basic physical aspects of plumbing and water flow were kept squarely in mind. Distance decreases water flow. Height decreases water flow (head pressure.) Corners decrease water flow. And reductions in pipe or fitting diameter decrease flow. Not wanting to make extra work for the pump, we minimized all of these impinging elements throughout the design/fabrication process. The design part of this is the real challenge and demands the attention of experts. The fabrication part is a basically rote affair involving just a handful of techniques anyone could learn.

PVC is strong stuff and many of the runs of pipe are self-supporting. When longer runs are required, snazzy little braces like the one below may be used to support the pipe. They're a two-part affair with a channel bolted to a flat surface and then a bracket anchored therein to hold the pipe.


Who doesn't love brackets?

Glued Connections
Glueing the pipes and fittings together is reliably water-proof and sturdy approach. But it can't be undone. Nothing you may ever want to remove for maintenance should be glued. Instead threaded couplers should be used. But much of the system, especially elbows and valves, are easiest to assemble with glued slip connections.

First, fittings are selected and pipes are cut. Cutting can be done with a power cutter, hand-saw or cord as shown above. Here's a little video of my pal, Andy, cutting a piece of PVC with the mighty power cutters. So awesome.


Once the pipes are cut, the ends are "reamed" using this bitchin' little tool, "The Reamer." This cleans the ends of any loose bits created during cutting and also puts a little bevel around the edge. This bevel's primary function is to make it easier to get the pipes apart after the dry fitting. Even so, some aggressive malletry is often required to separate pieces.


This "reamer" can put a nice clean beveled edge on a number of different pipe sizes.


Reaming a 3" section of 2" pipe. Big Sharpie marks like this are an aesthetic no-no. Use a pencil which is easy to remove from the final product. If you look closely, you can see the bevel on the top edge from reaming.

Pipes are first dry fitted (no glue!) to be sure everything fits. This is an exacting business. Once a good fit is determined, the pieces can be glued permanently into place. The glue itself is a two-part product with a primer and the glue itself. The primer cleans and "softens" the PVC to maximize the efficacy of the glue. Both primer and glue come in metal cans with application brushes attached to the lids. This stuff is pretty toxic and a high-quality respirator made for gases, not just particulates, should be worn throughout. Rubber gloves are also recommended.


Even though I'm extremely sensitive to chemicals, this stylish respirator allowed me to work around some pretty nasty fumes for hours on end.

Once the pieces are dry fit, marks should be made to guide the gluing process. Once the glue is on, things get a bit harry and you need landmarks so everything lines up the way it did during the dry fitting.


Little marks like these are essential for getting everything to line up and fit during the gluing process. Remember, use pencil which is easy to remove.

Here's a little video of my buddy, Chris, gluing a piece of pipe. As you can see, it all happens pretty quick. 37 seconds to be exact. First, the primer is applied to both surfaces, followed immediately by the glue itself. Then the pieces are fit together and oriented with any excess glue being quickly wiped off. Chris did not wear a respirator and reported only one herd of pink elephants so not too bad.


The glue we used was clear and is quick-set for medium-strength applications. The blue glue you sometimes see is for wet applications, is also quick set and requires no primer. Its blue messiness is not required for dry pipe like we were using. Finally, there is a grey variety used for high-pressure applications and requiring at least 24 hours of curing time.

Threaded Connections
Another way of connecting PVC, is using threaded couplers (including valves) called "unions" wrapped in Teflon tape. This wrapping has to be done in a certain way so the tape doesn't get all fouled up when the piece is screwed in. Hold the threaded fitting in your left had and wrap the tape over and away from you. Start at the edge furthest in and do more wraps there to achieve a slight taper, becoming narrower toward the leading edge. End your wrap with a couple times around the leading edge and smooth any little strands into the threads. Also, the tape role's orientation will affect your ability to keep tension on the tape. This is exactly how it should look when you're doing it right.


Wrapping the threads is straightforward but it has to be done a certain way to function properly.

After the threads are wrapped, the pieces may be screwed together. Often, hand-tight is sufficient. Sometimes, the added torque of channel-locks may be desirable. Be careful not to damage your pipe with the wrench.

Finishing Touches
Once everything is put in place and tested, it's time to clean everything and label it. Obviously, the work area needs to be stracked away. The system itself should be cleaned of all printed factory labeling using an appropriate solvent. All pencil marks and other fabrication marks should be removed. And everything should be clearly labeled with its function and direction of flow to facilitate any future repairs or maintenance.


Cleanly built and clearly labeled is the way a professional job looks when completed.

This was a fantastic learning experience for me and I'm thankful for the opportunity. May you all live long and prosper. And may your plumbing never leak.

Cheers, Paul


Saturday, November 10, 2012

Frankenshrooms


Mushroom Corals for the Aquarium

Of all the Cnidarians we keep in our reef tanks, "mushrooms" may be some of the most beautiful, easiest to care for and easiest to propagate of all. Unlike many of their betentacled cousins, mushrooms (also called mushroom anemones or mushroom corals or "shrooms") are very tolerant animals. Tolerant of low light, low flow and high nutrient levels (read: fish poo.) That doesn't mean you can keep them under a candle in a cup of coffee. But it does mean they are excellent "beginner corals". One caveat here; because these animals are so tolerant and so prolific, they can "take over," especially in a small tank. Further, as many saltwater aquarists mature in the hobby, they turn toward stony corals, especially SPS corals, and it can be very difficult to rid a tank of the shrooms introduced as a newbie. In particular the red form of Discosoma sp. has a mind-boggling ability to reproduce with the little buggers cropping up everywhere.

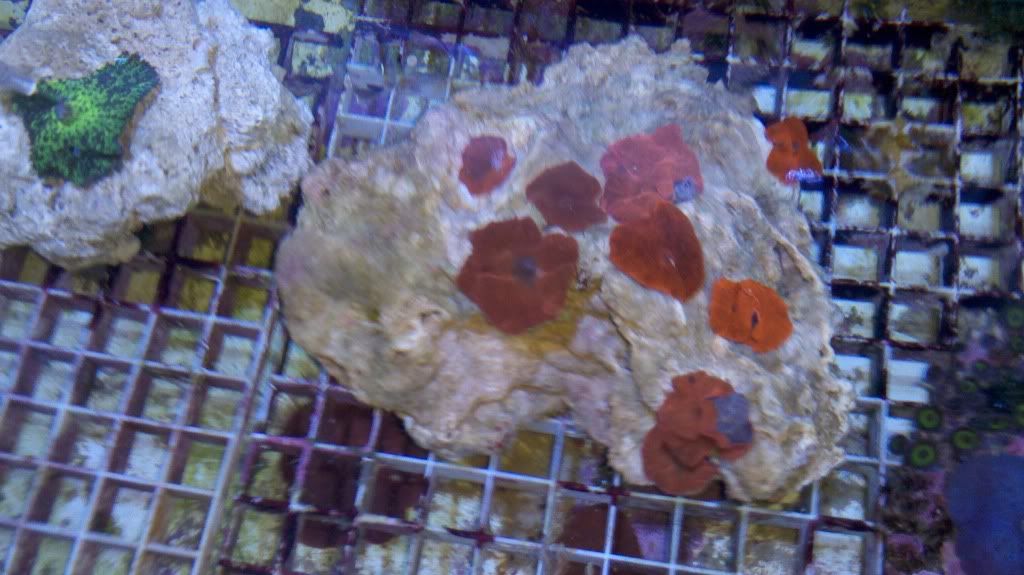
These red mushrooms appeared in this spot in the author's tank on their own.

As the animals divide by fission, they can cover the rock they're on. And once they do, they starting releasing from the rock and drifting to settle in new spots. You never know where one will pop up. For some aquarists like myself who want them to proliferate, this reproductive capacity is a welcome boon. But for those who don't, the mushrooms can become invasive, with Discosoma spp. being potentially much more so than the other genera.

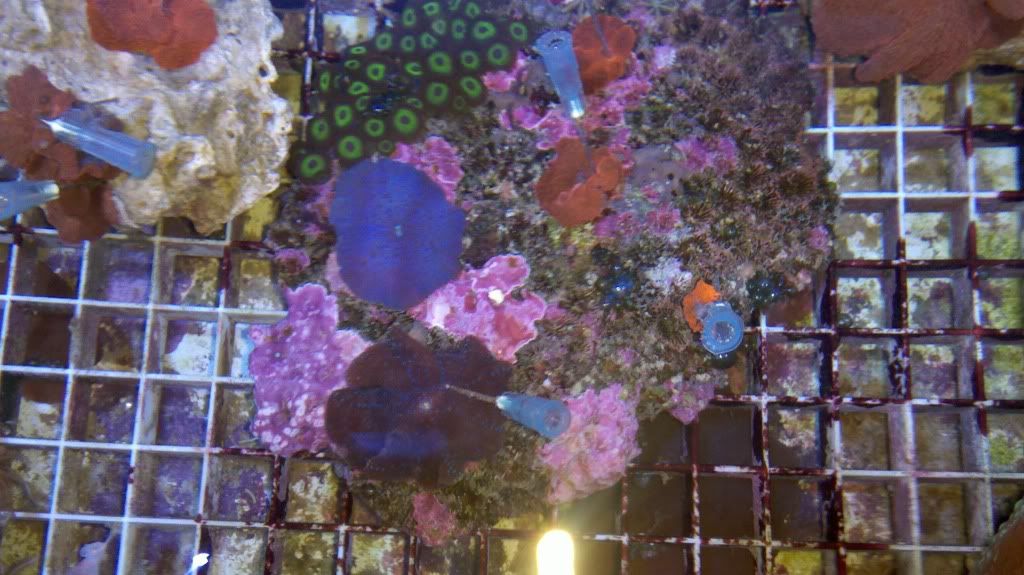
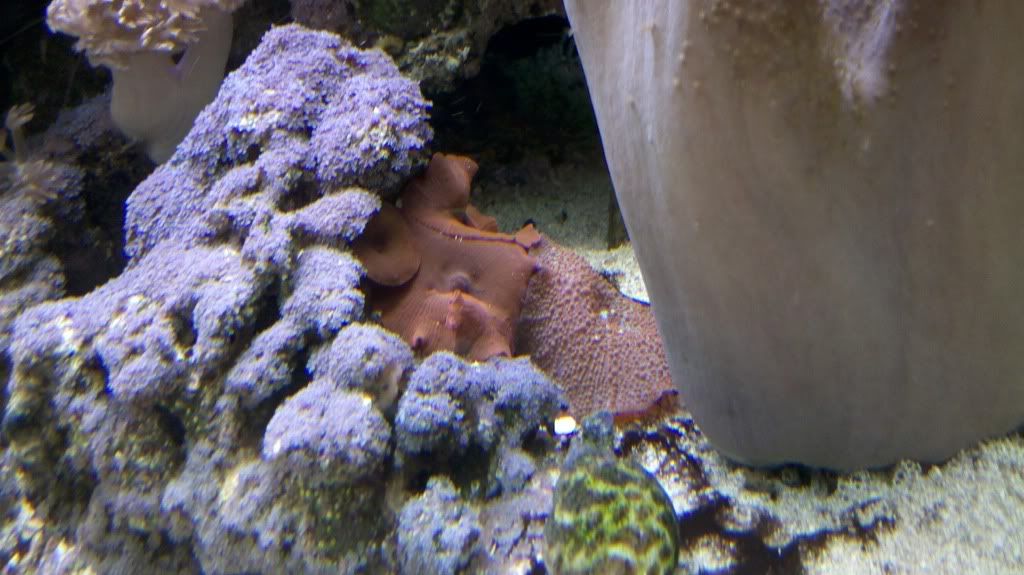
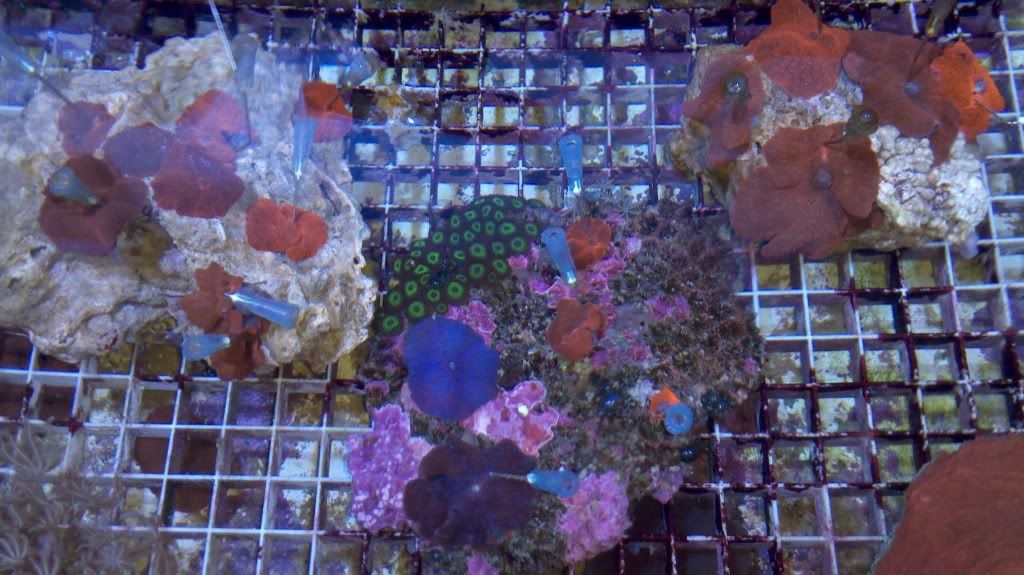
Four different types of shrooms in the author's aquarium. The two species in the foreground are likely Rhodactis spp. and the red and purple shrooms in the back are Discosoma sp.
A quick note about terminology. I will refer to the entire group of animals discussed here alternately as "mushrooms", "mushroom corals", "mushroom anemones" and "shrooms". All the terms are used by aquarists and hopefully it makes the reading a little more interesting and not a little more confusing. When discussing the various genera of mushrooms, I will sometimes use just the genus and will sometimes add "sp." or "spp." If the "sp." is used, it means the mushrooms being discussed are likely from a single species within that genus. If the "spp." is used, it means the mushrooms being discussed are likely from multiple species within a single genus. This is all for the sake of conveying meaning and doesn't necessarily always conform to official taxonomic standards.


Biological Basics
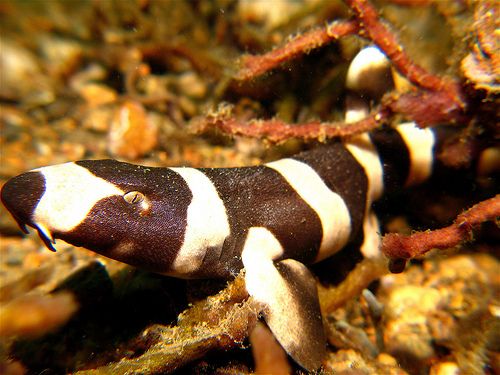
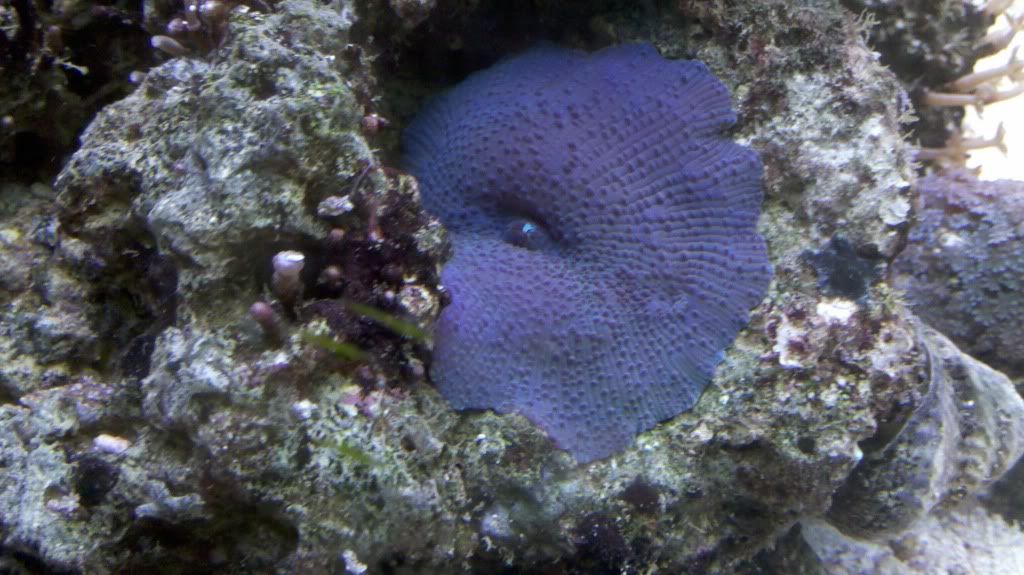
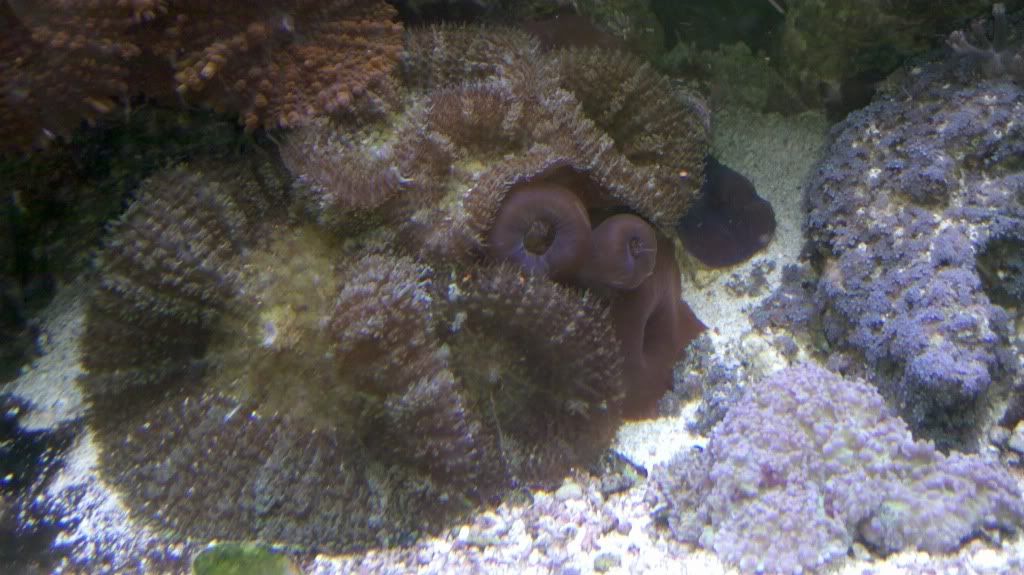
Now, let's turn our attention to the basic biology of the various species of mushrooms we keep. Mushroom anemones are considered Corallimorpharians and are sometimes referred to as "Corallimorphs." Typically, these animals can only be identified to the genus level by aquarists. And, as is often the case in reef-keeping, the genus level is the perfect level of detail to know for the purposes of keeping and discussing these animals. The three main genera of mushroom anemones kept in aquaria are Discosoma, Rhodactis, and Ricordia. Animals from all three groups have a number of basic Cnidarian characters in common including radial symmetry and a single gut opening. Rhodactis and Ricordia also have small stinging "psuedo-tentacles", while in Discosoma, these tentacle-like structures are largely reduced or lost. Mushrooms adhere to rocks with a foot just like other anemones. And, like other anemones, they can slowly wander. The column of mushroom anemones is basically non-existent. The top surface of the mushroom is called the "oral" side and the bottom is the "aboral" side, again, just like with other anemones. Finally, whether or not they use it, mushrooms have a mouth located in the middle of the oral side. These are not colonial animals in that there is no shared base of tissue under a group of mushrooms. But like colonial Cnidarians, aggregations are likely genetically identical clones formed by fission or "division" as aquarists often call it. Presumably, these animals can broadcast spawn but in aquaria, propagation is primarily through division.

Discosoma spp.
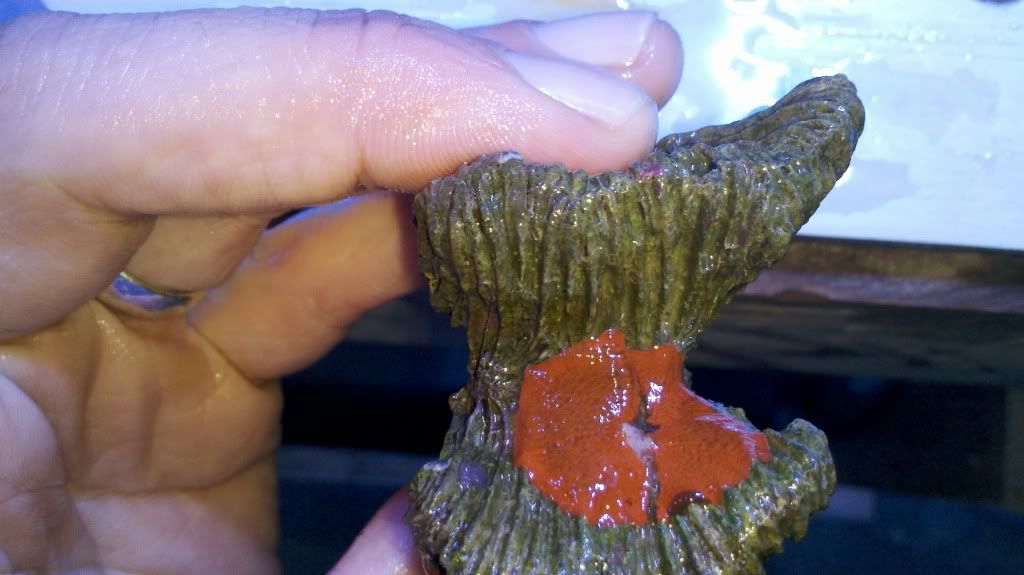
The genus Discosoma is synonymous with and has replaced the genus Actinodiscus. These are the classic shrooms. They tend to be basically flat with little in the way of tentacles. They sometimes have small bumps on their surface which can be of contrasting color and they sometimes have little irregular protrusions around the margin. They do have a mouth in the middle like all Cnidarians but they really don't feed on meaty foods, deriving their energy pretty much entirely from their symbiotic zooxanthellae and their nutrients by absorbing them from the water column (this from anecdotal information/personal observation/speculation.) These animals actually need a certain amount of nutrients in the water and thrive in "dirty" tanks. Brand new or sterile tanks with ultra-low nitrates are not ideal for mushroom corals. Though they may survive, they'll likely not proliferate the way they can in more mature tanks with higher bioloads.

A purple form of Discosoma sp. in the author's aquarium. Like the red ones above, this little guy just popped up here.
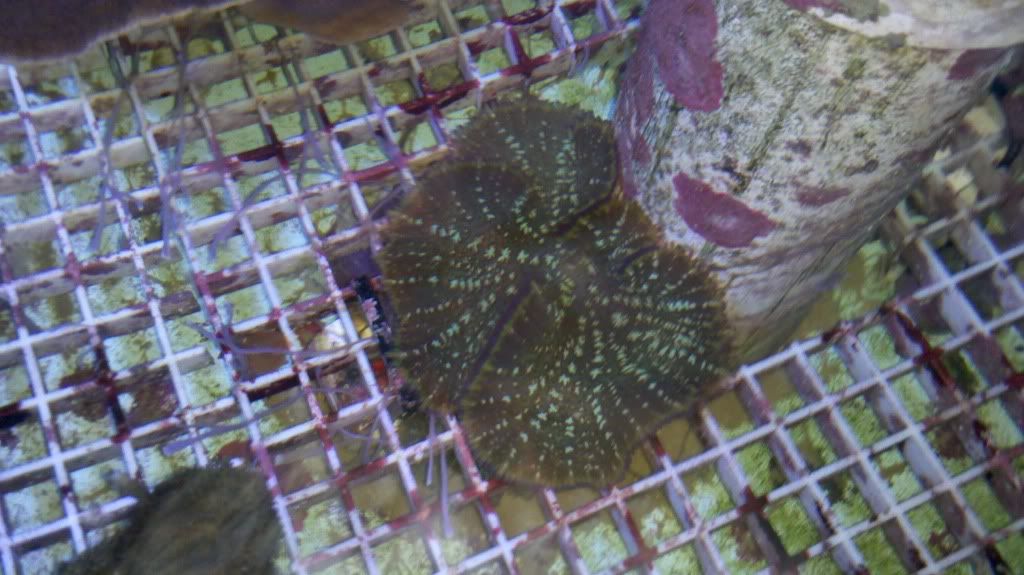
Rhodactis spp.
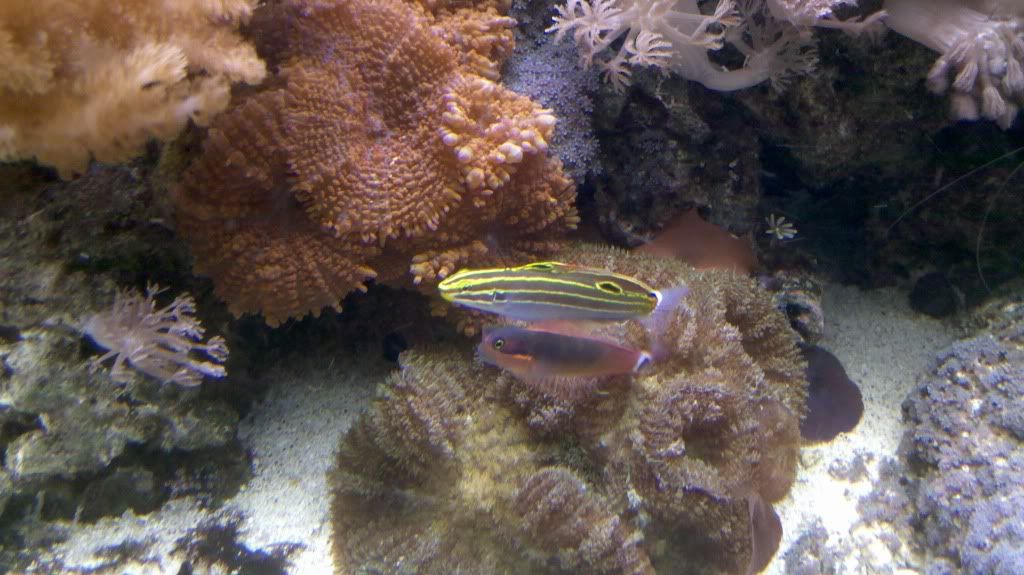
The Rhodactis shrooms are equally hardy and tolerant to their Discosoma cousins. They can tolerate similar low-light, low-flow, high-nutrient environments though they seem to be somewhat less tolerant of very low light than Discosoma. They also tend to divide somewhat less vigorously than Discosoma. Rhodactis mushrooms typically have small "psuedo-tentacles" densely distributed on their surface which give rise to one of their common names, "hairy mushrooms". These structures may be indicative of an ability to capture prey and indeed, unlike Discosoma, the Rhodactis mushroom will eat meaty foods with the largest species even being reported to capture small fish though that is unconfirmed by the author. Here are some Rhodactis mushrooms eating pelletized fish food that has fallen on their oral surface during a fish feeding. You can see three of them on the right are closed up around their food.

Rhodactis mushrooms feeding.
Ricordia spp.
Of the three genera commonly kept, Ricordia are the most particular mushroom anemone in terms of their environmental requirements and also, somewhat surprisingly, their hysterical and wholly uninformed political views. I don't have access to any photos of Ricordia spp. shrooms as the Ricordia florida specimens I once had wasted away. I now believe that was likely from a lack of feeding and perhaps inappropriate light. Ricordia spp. and especially Ricordia yuma, are widely considered to have the most specific lighting needs of any mushroom anemone. Any aquarist introducing yumas into their tank should be prepared to adjust their height until a healthy light level is determined. Yumas are also generally the most expensive mushrooms around so I've never tried them. They can be differentiated visually from Ricordia florida by the presence of psuedo-tentacles on the oral disc or mouth itself. Florida lacks these. Ricordia yuma also presents the greatest and most spectacular array of colors in the mushroom world. I'll leave it to you and your search engine of choice to confirm that.


Keeping Mushrooms
As has been discussed above, mushroom anemones are generally not fussy critters. I'm going to focus these keeping notes on Discosoma and Rhodactis species with the understanding that Ricordia mushrooms are somewhat more demanding over-all in terms of lighting and feeding.

Mushroom anemones appreciate the same basic reef tank parameters as any other animals in terms of salinity, temperature, ph, etc. with stability in all areas being paramount. But more than perhaps any other commonly kept Cnidarian, mushrooms can handle very high nitrate and particulate levels in the water. In fact they seem to thrive on it. Any time I've gone too long without a water change, most of my corals start to look funky but my mushrooms look freakin' amazing! They get huge, their color deepens and they just generally look happy. And they divide more frequently. All these attributes make Discosoma spp. and Rhodactis spp. mushrooms perfect beginner corals. This shouldn't be confused with "disposable corals." Beginners need to do their homework in books and online, not by killing things. These animals do require a modicum of attention and care. But they're pretty much the easiest reef tank animal there is.

Various Discosoma spp. actively mixing with some Cabbage Leather, Pom-Pom Xenia and a mat of a low, purple Octocoral species. Mushrooms generally play nice with other mushrooms, polyps, leathers and soft corals. They may negatively impact LPS and SPS corals. My son's favorite "Lellow Goby" presides.

All of the common types of reef lighting are fine for shrooms with higher intensity lighting requiring lower placement in the aquarium. Don't fry your shrooms, dude! Mine are kept happy under T5HOs in my 75 gallon from the bottom of the tank to the top. I've seem mushrooms thrive under metal halide, power-compact and LED lighting as well. Ricordia species generally require a little more light though, as mentioned, this is not a genus I've had success with. I suggest additional reading for anyone considering Ricordia mushrooms for their reef.

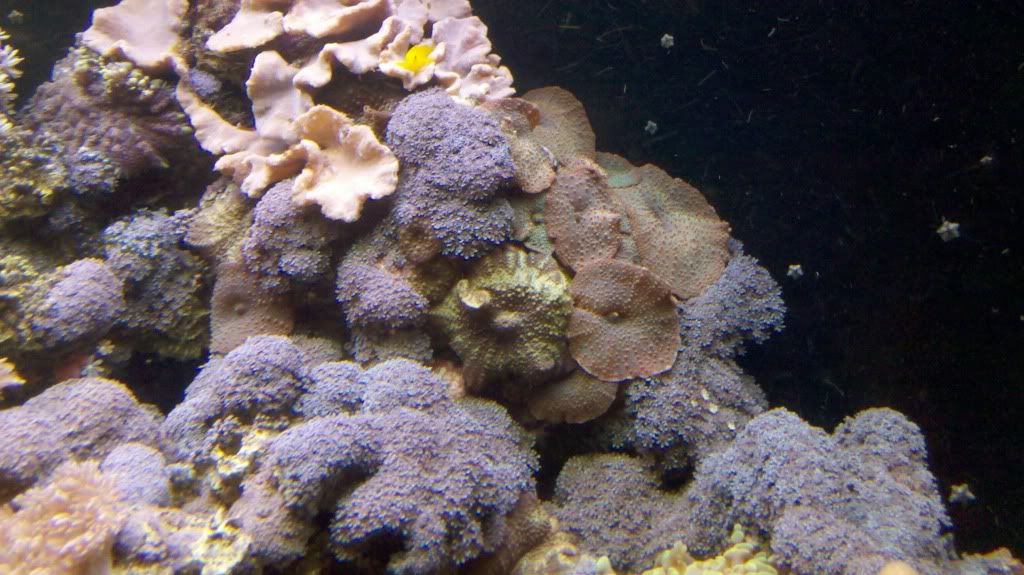
As is mentioned in the caption above, mushroom corals are fairly non-stingy and mixed well almost all other non-stony corals. They look awesome on rocks with a mix of color morphs and maybe some zoos.

A mixed mushroom/zoanthid rock in a holding tank. The needles are holding new mushrooms in place until they attach. We'll discuss this method and others in the propagation section.


Feeding Mushrooms
Discosoma spp. mushrooms do not need to be fed. They only need decent reef lighting and sufficient nutrients in the water to survive, grow and reproduce. Rhodactis spp. mushrooms appreciate the occasional feeding of meaty foods or even fish pellets or flake. When they're feeding, you'll see them close up around their food making them look kind of inside-out. Recordia spp. also feed and likely need even more meaty foods than Rhodactis spp.


Propagating Mushrooms a.k.a. Frankenshrooming
Propagating mushroom anemones in the aquarium pretty much takes care of itself provided their basic requirements are met with aggregations forming rapidly from a single shroom. In a holding tank or propagation facility, a more strategic approach might be desirable and to that end, I present a couple of options.

Needling
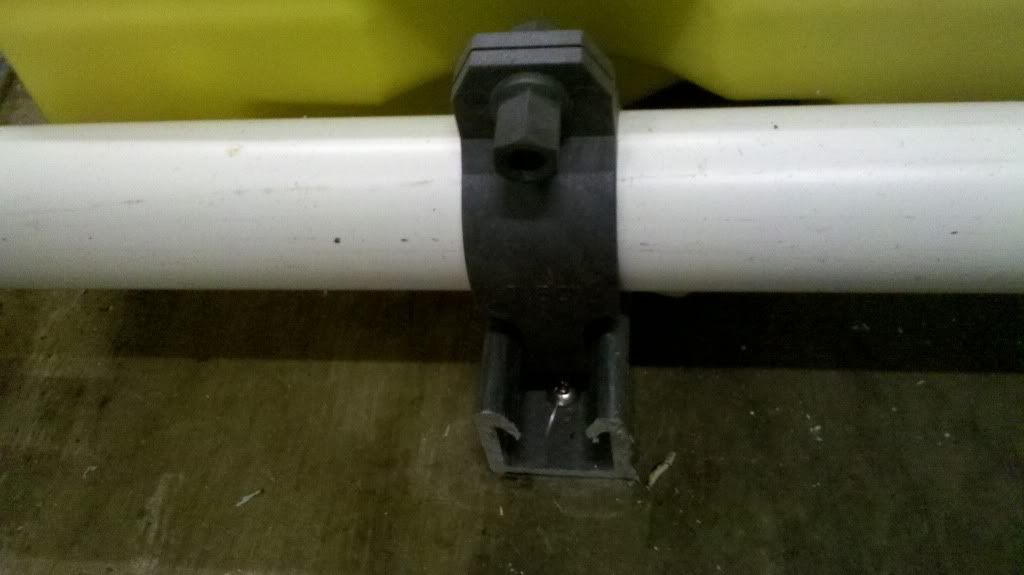
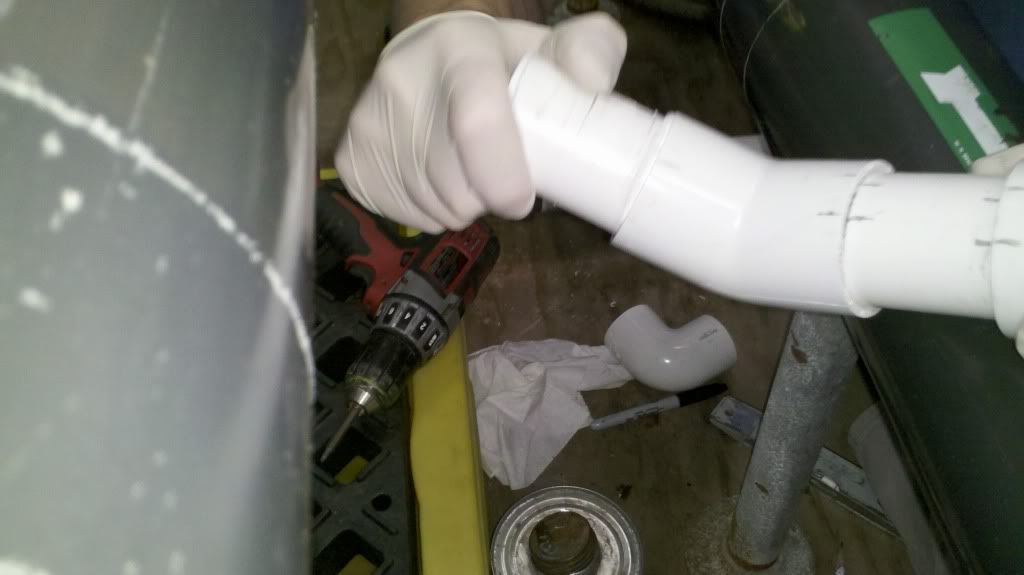
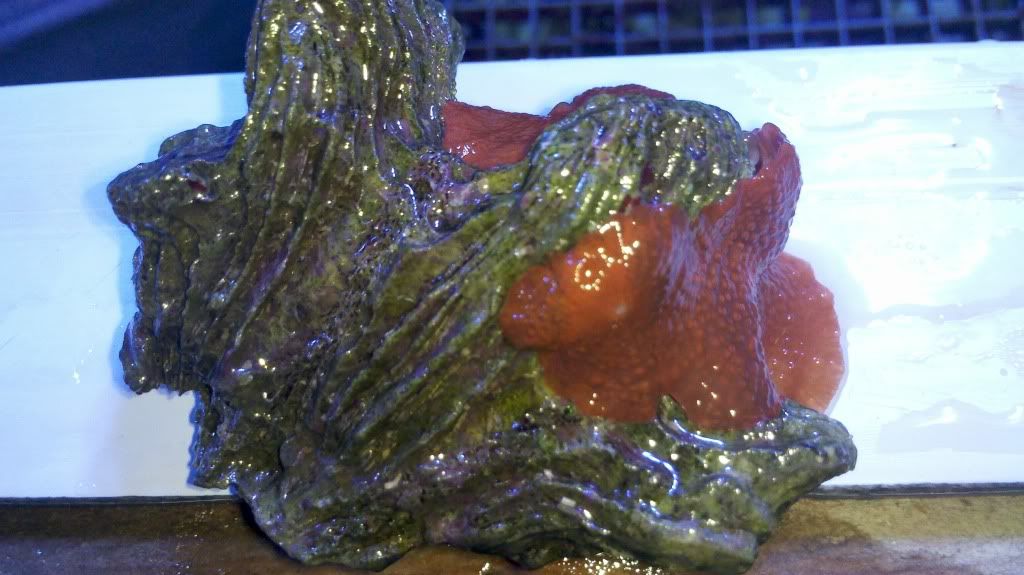
The first technique is to attach free-floating or salvaged shrooms to a rock using stainless steel hypodermic needles. This allows the aquarist to attach many mushrooms exactly where desired. This technique can be used only when the mushroom is unattached to any hard substrate. If the animal is attached to a small piece of rock or similar, this rock may be glued to another, larger rock by standard means. But if the mushroom is found drifting in the tank or if it is removed from a smooth, hard surface like egg-crate or aquarium glass with a razor blade, it is a good candidate for this needle technique.

Mushrooms attached to undesirable substrate like this standpipe in a holding tank are good candidates for removal with a razor blade and attachment with a needle.

This rangy little red number amongst the muck and mire of the bottom of a holding tank will make a lovely specimen once it's removed and attached to a rock with others of its kind.

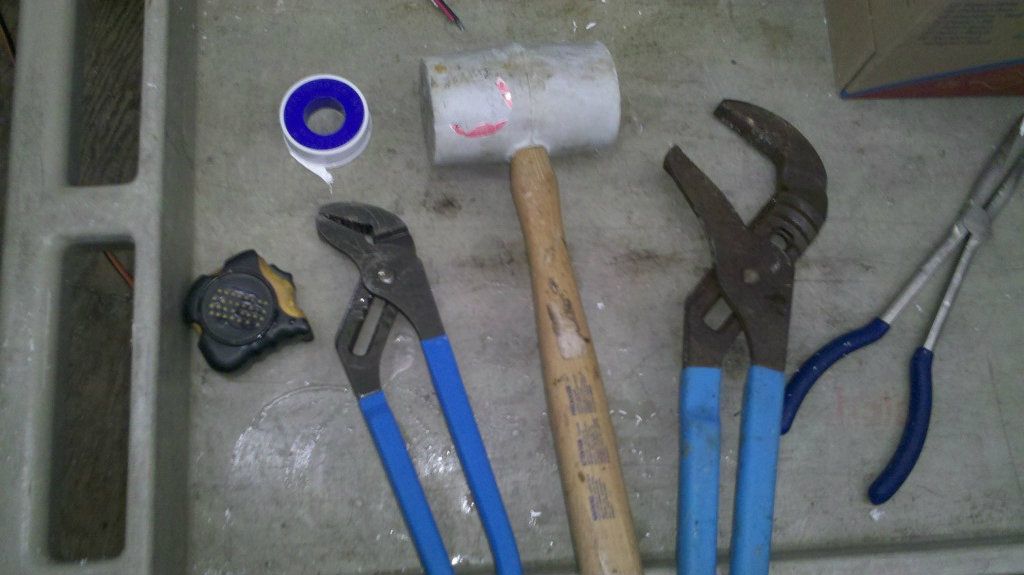
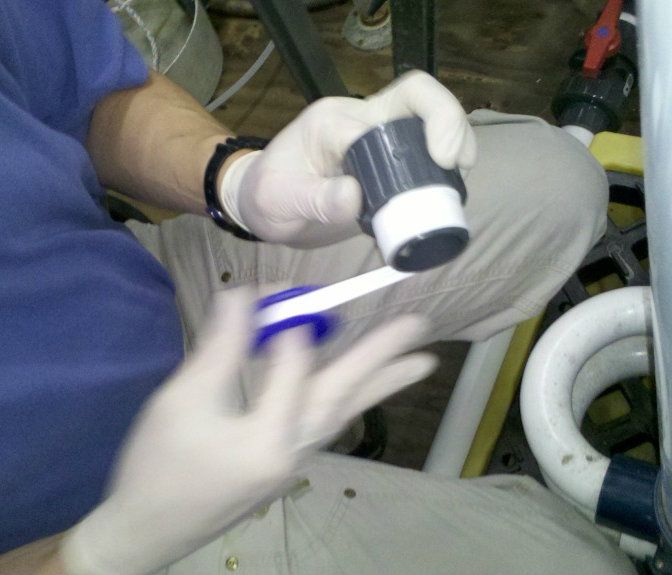
A couple items should be noted. First, even though the needle you'll use is stainless steel, that doesn't mean it won't ever rust, especially, it seems, if the needle has been bent. Needles should only be left in the water for a few days which should allow the animal to attached. And needles should be inspected for rust daily. Rust is definitely negatory in the reef tank environment. Second, needles are pokey and you could inadvertently inoculate yourself with shroom juice like the unfortunate aquarist from Hoboken, N.J. pictured below. Be careful.


Luckily this ill-fated aquarist was taken to a local hospital where an antidote of highly repressive cultural values was administered just in the nick of time.

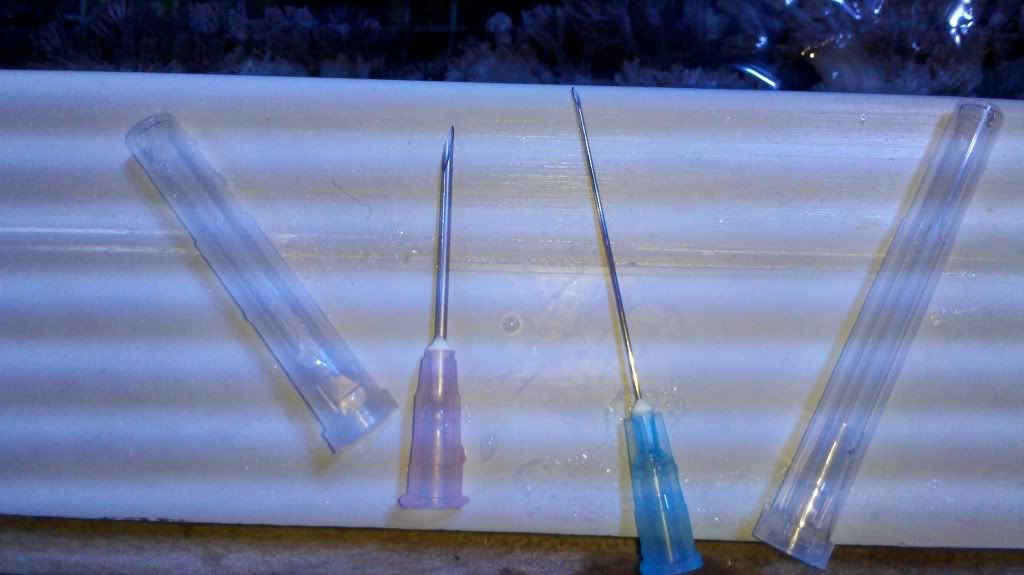
Many lengths and gauges of needles are available. Shorter, thicker ones are much less likely to bend during insertion into the rock. And the thicker needle doesn't appear to affect the animal any more or less than the thinner one. These needles are incredibly sharp and damage to the shroom is minimal. Like piercing its tiny little ears.

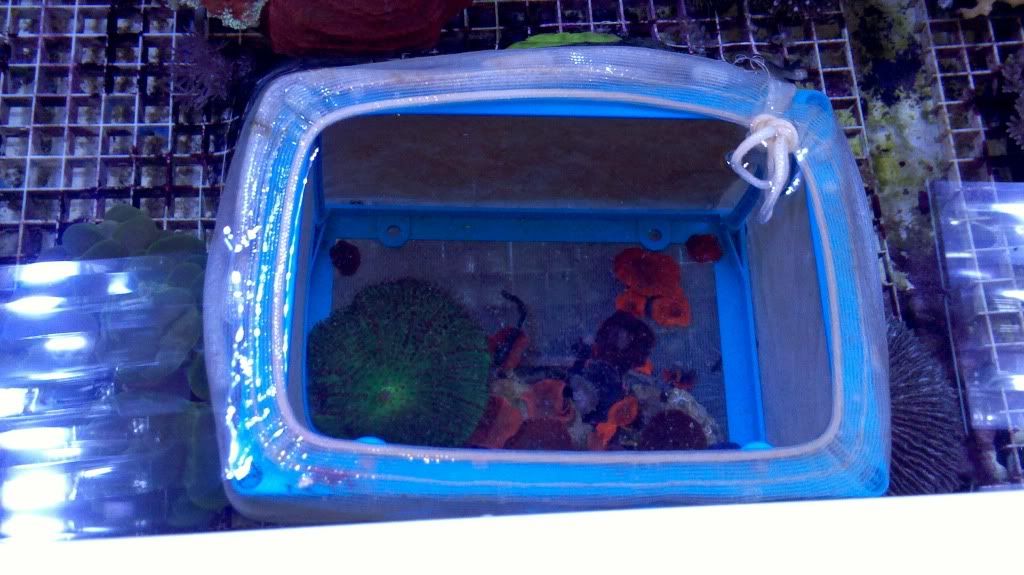
A breeder net like this with a long piece of foam wrapped around it for floatation is useful in any number of applications in a holding, propagation or grow-out tank. This one holds salvaged shrooms ready for pinning.

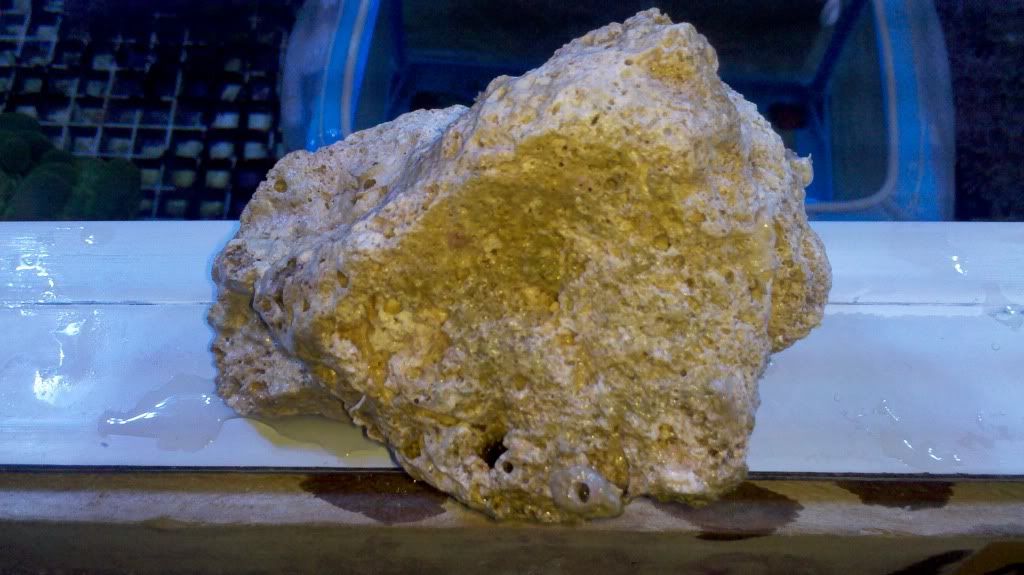
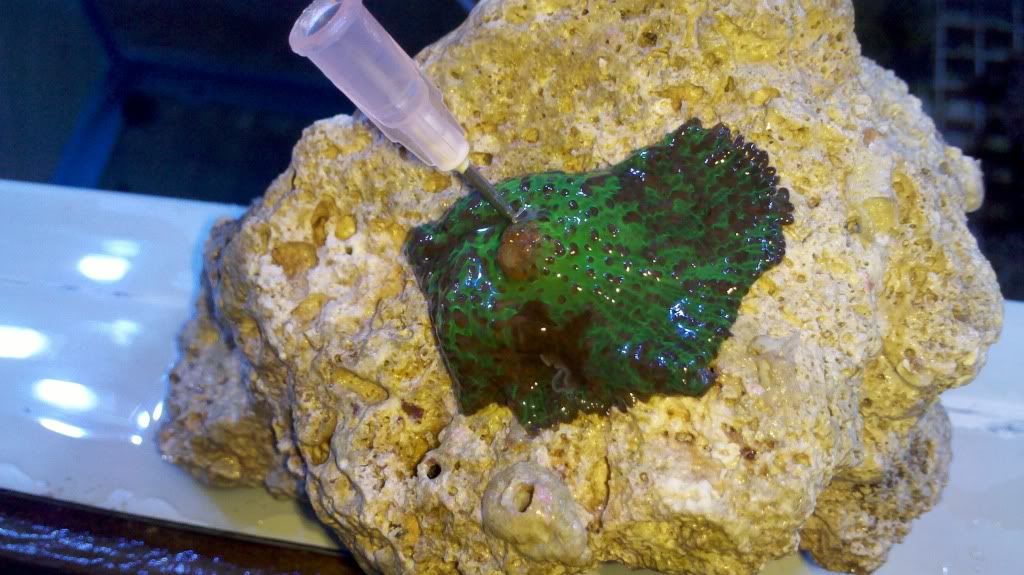
This fist-sized rock with lots of tiny holes in it is perfect for this application.

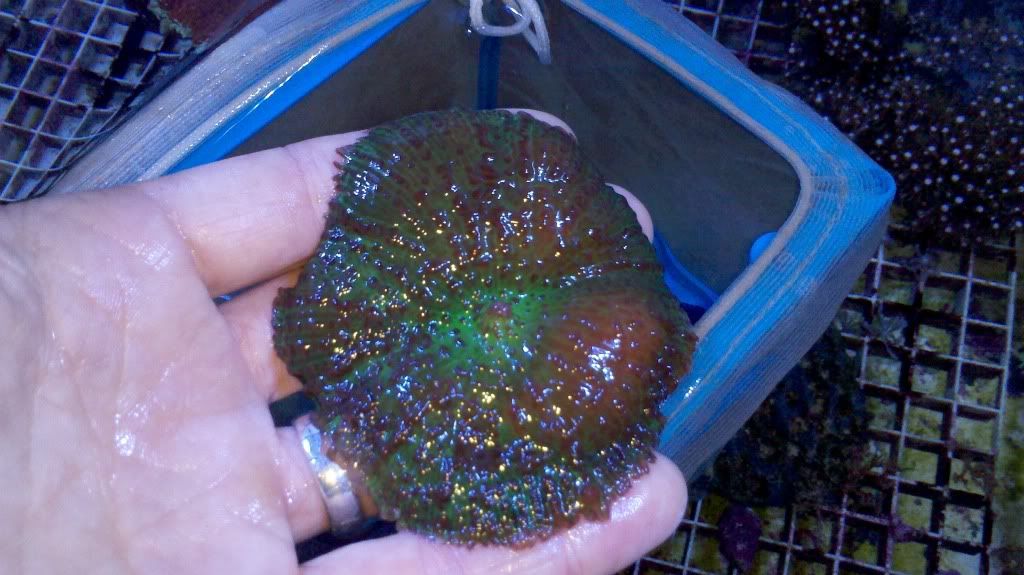
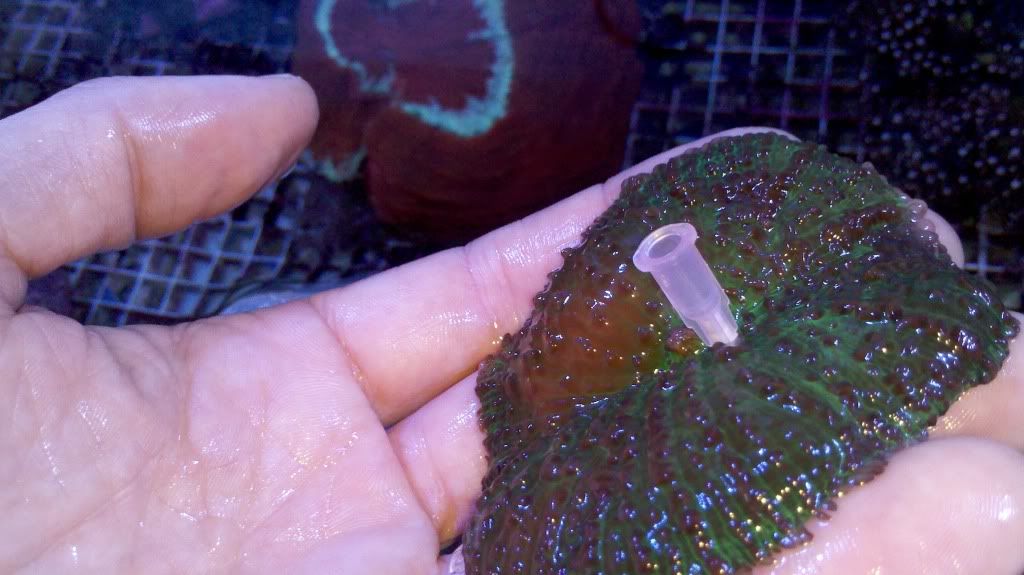
This beautiful Cnidarian is about to have a new home.

The pin is in. Don't worry, it's going between my fingers.

Ladies and gentlemen, we have attachment!

Another approach is to lay out multiple mushrooms first and then pin them all. All of this is done out of the water on a clean, stable surface.

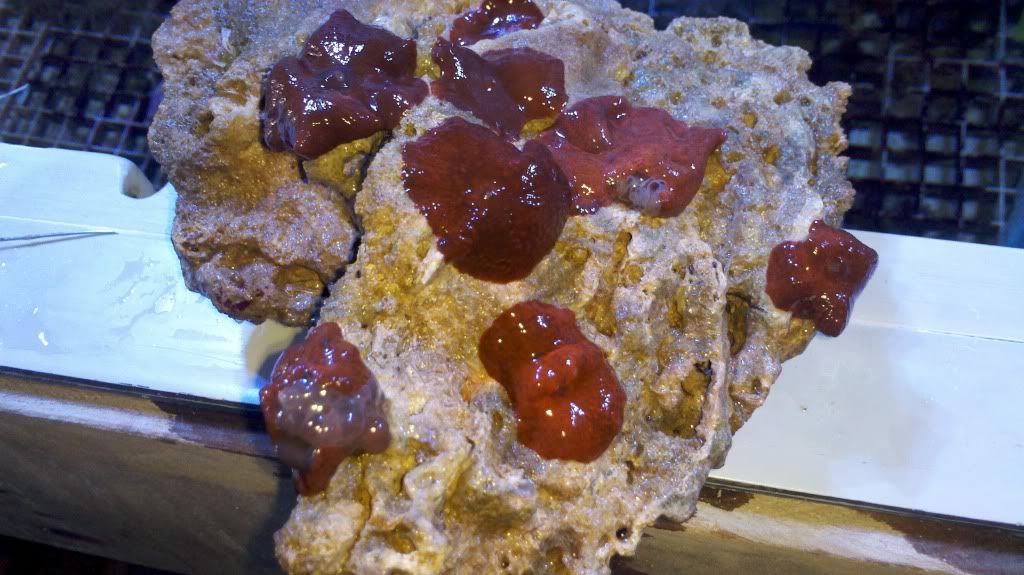
Salvaged red shrooms laid out for pinning to a rock.

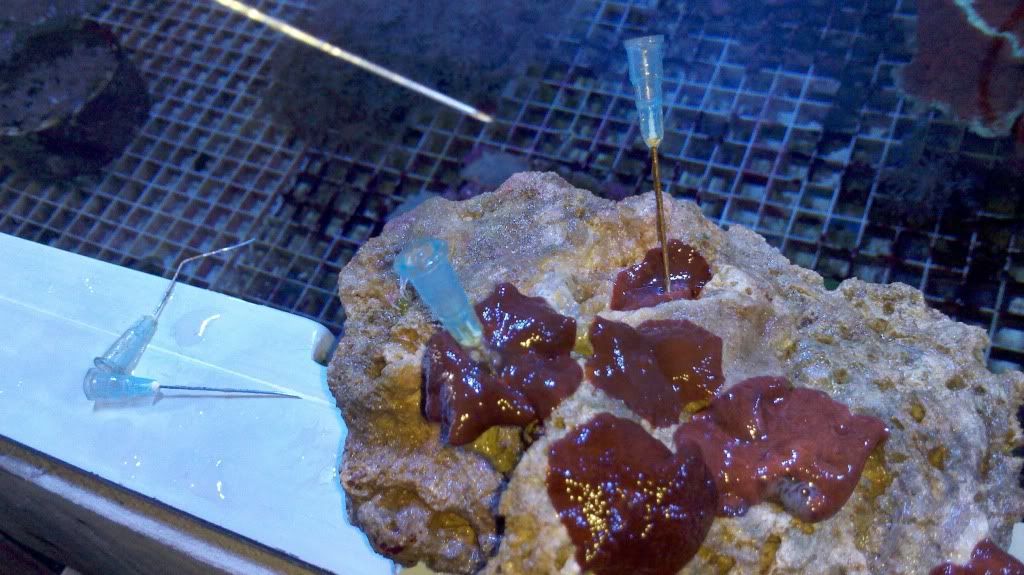
Putting in the needles. Note the bent needle on the left. This was before I discovered thicker, shorter needles were far more stable for this application.

And back into the holding tank while the mushrooms attach.

Another method of attaching unattached shrooms to solid substrate is to line the bottom of a breeder net like the one pictured above with small pieces of rock rubble and toss in a bunch of shrooms. Once the mushrooms attach, the pieces of rubble may be glued to larger rocks by standard means. This approach has the advantage of a bit less labor and materials but I think the needle method allows for speedier and more purposeful creation of displayable specimens. Finally, some aquarists will attach free shrooms to a rock by rubber-banding them loosely in place until they attach. I haven't tried this method but it sounds reasonable.
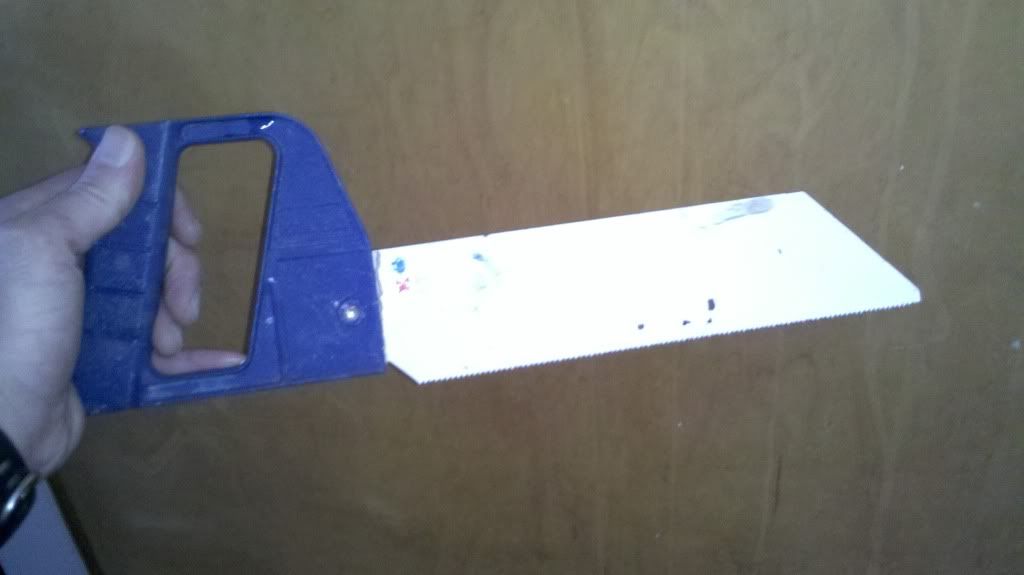
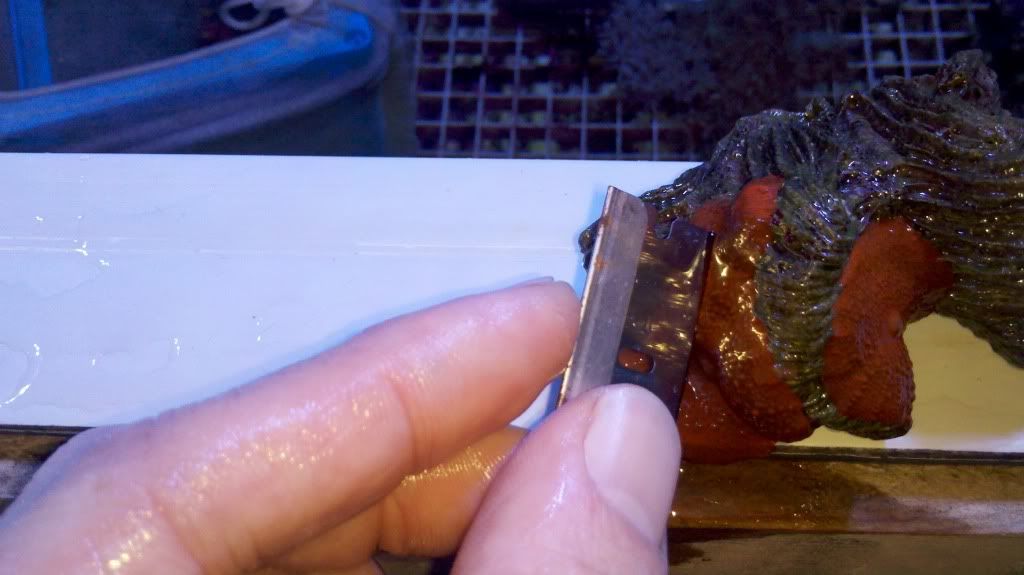
Razoring
This propagation technique is useful when the mushroom is attached to a desirable substrate but accelerated division is sought. It involves slicing the mushroom in situ with a razor blade. Care should be taken to always slice through the mouth in the center. It is presumed this aids the animal's ability to heal and become two mushrooms. This technique may be used to create two mushrooms from one but reports of successfully creating four or more new mushrooms from a single shroom are not uncommon. Always slice through the center regardless of the number of clones created.

A few mushrooms attached to a piece of dead coral skeleton make a good candidate for my slicing experiment. Many aquarists have reported good outcomes with this method.

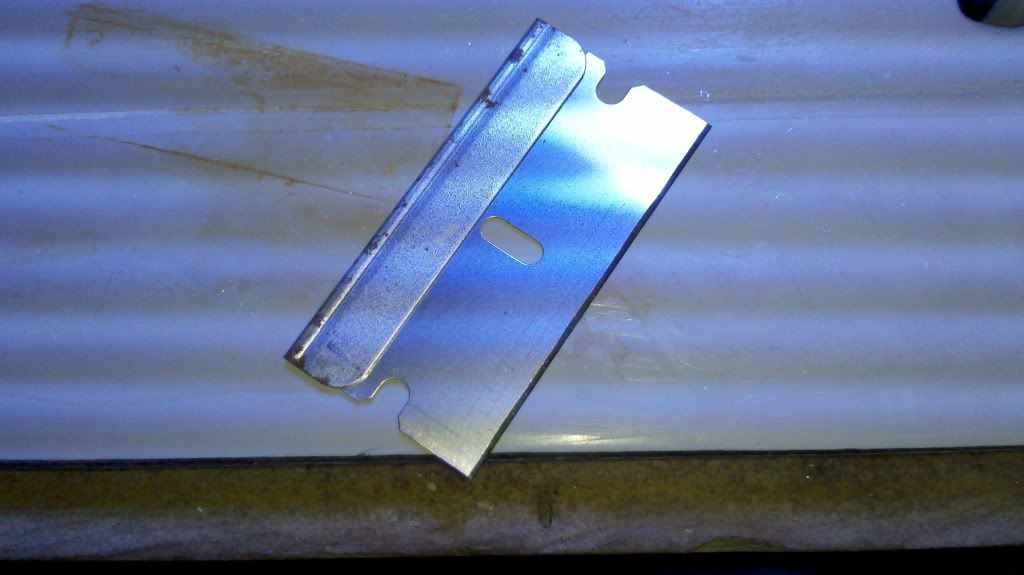
Ye ol' razor blade. Careful, they're widely considered sharp!

Making the cuts. Remember, regardless of the number of pieces created, every cut must bisect the animal, passing through its mouth, to maximize chances of success.

A cut mushroom ready to go into the holding tank for healing. I'm not sure exactly how long that will take but I would estimate 1-2 weeks based on how fast they divide naturally.

Blending
I haven't tried this technique, perhaps because I don't want to pay the cost of a good divorce attorney, but supposedly you can toss a few shrooms in a kitchen blender, pulse a couple times and pour the slurry over rock rubble to create a gajillion new little shrooms. Sounds pretty reasonable but you and your domestic partner(s) will have to be the last word on that for you.


Conclusions
Mushrooms anemones are a fun and beautiful group of animals to keep in your reef tank. They're easy to care for and reproduce readily and rapidly. Remember just a couple of key aspects to their husbandry, namely that they need low to moderate lighting and nutrient-rich water, along with basic reef tank parameters, and you should be well on your way to a groovy little shroom garden.


Sources
The information presented here is largely from my own experience. I have also gained information and insight regarding the care and propagation of Corallimorphs from various books and online resources.

Cheers, Paul

Needled shroom rocks in holding.


Saturday, November 3, 2012

Reeferences


Introduction
I have been working with glass boxes of water for about 5 years and in that relatively short amount of time I've learned A TON! Make no mistake, I am certain I have 100 tons more to learn. But I've learned a lot from a range of sources and I'd like to share those sources in this post. First, a little background about me. I began my fish keeping odyssey via my daughter's Christmas present in 2007. I set up a freshwater 20H for her in response to a great fondness she had developed for one of her picture books about fish. She was interested and loved watching the tank. But it was me who fell head-long into the hobby. I've had an affinity for the wild world throughout my life. As a youngster, I wanted to be a zoo keeper (alongside ballet dancer and basketball player) and I think one of the best ways to connect people with the wild world is through the unwild world of zoos and aquariums. So, here I am 5 years later having returned to school to pursue a career as a professional aquarist. Of course, it's nearly impossible to find a university program dedicated to the captive care of marine animals. So volunteering at a public aquarium and keeping my own reef are key aspects of my job training. Perhaps more important than the B.S. in Aquatic and Fisheries Science that I'm working toward. What the schooling does offer is the hard-core biology as well as the evolutionary systematics of the animals we keep. And the insights I've gained from that perspective have been and continue to be profound and influential. But there's no substitute for experience and I've learned the most from keeping my own tank. Here's a sketchy little video of my mixed reef.


In addition to active and rational observation of your tank, good sources of written information are key to successful reef keeping and minimizing losses which should really be the prime directive for all reefers. Do no harm. Of course, we regrettably do do harm sometimes in keeping marine animals in captivity and sometimes it's the fault of the keepers and sometimes it's not. When pushing the frontiers of keepable animals, there is an expected lack of info to go on and losses are nearly inevitable. Especially in terms of sustaining obligate feeding fish, azooxanthellate corals and a number of other difficult animals like pipefish, boxfish, ribbon eels, etc. Is it worth it? That's for people to decide for themselves and the answer is not always clear to me. In general, I feel it IS worth it in terms of the information gleaned and the potential to enrich lives and connect people with nature and beauty. But there's a huge responsibility that comes with keeping captive life and I encourage all aquarists to keep this notion squarely in their minds as they pursue their aquarium keeping.

Even though we've come a long way since those sterile early fish-only tanks with bleached coral skeletons (At least most of us have. Shame on you, my dentist!), the keeping of marine aquaria is still in its relatively early stages and technologies and philosophies are continually evolving and adapting. Keeping live coral long term, especially SPS corals, was once matter-of-factly considered impossible. A look at English aquarist David Saxby's amazing aquarium gives a good idea of how far we've come.


And we've come that far on the backs of some key authors who've written the seminal texts of our hobby. Here are are the books that have been most important for me as I've learned the science and art of reef keeping. These books are all available online, but I encourage you to consider purchasing them from your local, independent book store or your favorite LFS.

Books
The Reef Aquarium, Vols. 1, 2 & 3 by J.C. Delbeek and J. S. Sprung.
These three books pretty much set the standard for reef keeping texts. And they do read kind of like textbooks which can be a turn-off. But they are absolutely chock full of information about the animals and technologies of reef keeping and provide an incredibly detailed and authoritative view of the hobby.


The Conscientious Marine Aquarist by Robert M. Fenner.
Bob Fenner is one of my very favorite aquarium authors to read and this book is a close second for me in terms of being the reef keeping text with great information on both equipment and animals.


Reef Invertebrates by Anthony Calfo and Robert Fenner.
This is a remarkbly detailed and expansive look at marine invertebrates for aquaria. Both authors use their heads and their hearts in their approach to reefing and it comes through loud and clear in this book.


Invertebrates by Julian Sprung.
From one of the true pioneers of reef keeping comes this guide-book like text filled with coffee table-worthy photos. A great book to just read, look and be inspired.


The Marine Fish Health and Feeding Handbook by Bob Goemans and Lance Ichinotsubo.
This is the only book I've used that focuses on fish health exclusively. An interesting read and a good go-to reference for disease fishues. I like Lance and appreciate his contributions here and on Advanced Aquarist. Bob, on the other hand, is a climate change denier who wrote a letter to the editor of Coral Magazine condemning an article published therein about climate change and reefs as political. If he had some facts to back up his position, I might be more sympathetic. I still like this book.


Marine Aquarium Handbook: Beginner to Breeder by Martin Moe Jr.
This book is considered an authoritative classic by a pioneer in captive breeding of marine aquarium fishes though I have not read it myself.


The Complete Illustrated Breeder's Guide to Marine Aquarium Fishes by Mathew L. Wittenrich.
Another book I haven't read but Mr. Wittenrich is a great writer and a renown pioneer in marine fish breeding. Certainly an important text for anyone interested in the reproductive side of the hobby.


I'll end this section with the 3 books I have used the most as references for stocking my reef.

Reef Aquarium Fishes by Scott W. Michael, Marine Fishes by Scott W. Michael and Marine Invertebrates by Ronald M. Shimek. All three are in guide-book format and, as such, are very easy to reference. Michael's books are the best fish books in the business and his photography is fantastic. He also has a series of larger, taxa-specific texts but their cost is high and he hasn't covered some of my favorite taxa so those books aren't part of my library. These two guides are simply essential. Shimek's invertebrate guide is every bit as comprehensive and beautifully illustrated as it's fishy companions. And Dr. Shimek is hands-down my favorite marine aquarium author. He's bright and funny and a true joy to read.


Internet
I think at least a small library of hard-copy books is important for any reef keeper. Only in a book can you achieve the information density necessary to really lay the cognitive ground-work for a beginning reef keeper. But books are expensive and cannot stay as current as electronic resources in a number of important ways. Further, you can't really interact with a book in the way you can an internet forum. The following resources should not and cannot replace the texts above. But they have been absolutely key to my relative success and are as important as books for all reefers.

Reef Central
This is THE marine aquarium forum in the world and there are many very experienced aquarists on the board who are ready and willing to help their fellow aquarists with everything from choosing a skimmer to identifying diseases to evaluating stocking choices. Of course it's buyer-beware on any forum and one must keep one's wits about one. Also, these folks are not always the most forgiving and if you act like a moron you will be treated as such.

Advanced Aquarist
This site is basically a blog with multiple contributors including some very well-known experts in the field. All manner of marine aquarium-related topics are covered from the latest equipment to issues of public policy and conservation to success reports of keeping and breeding marine animals in captivity.

Reef Builders

Another blog with multiple contributors focusing on all aspects of the hobby with lots of product reviews.

Wet Web Media
A Q&A forum operated by Robert "Bob" Fenner with a uniquely conversational format and multiple contributors. A fabulous resource.

Fish Base
An authoritative and comprehensive database of marine fish information. A go-to source for me.

Microcosm Aquarium Explorer
From aquarium fish to tropical travel destinations, this site covers both fresh and saltwater related info and is fairly vast. I've only begun to explore it's limitless depths.

Red Fish Magazine
A digital magazine for fresh and saltwater keepers.

Wikipedia
Not considered terribly sciencey but if you're in the sciences and you say you never use the mighty Wiki, you're lying.


Magazines
Coral
This is the magazine, period. Authoritative, detailed and seemingly not dictated by advertisers. I've got nearly every issue and I reference them all the time. I could subscribe but buying them at my LFS gives them some business and me an excuse to go to the fish store.


Textbooks
These are the two key biological texts from my school program. Both are incredibly detailed and authoritative. And they're readable. This level of understanding can reveal all sorts of insights into reef keeping. And yet the detail can be prohibitive for many. I love it.

The Diversity of Fishes: Biology, Evolution and Ecology by Gene S. Helfman, Bruce B. Collette, Douglas E. Facey, and Brian W. Bowen.


Biology of Invertebrates, 6th edition by Jan A. Pechenik


Vendors
Marine Depot
The best online source for marine aquarium equipment. The best prices, selection and customer service. If you can, I encourage everyone to patronize their favorite LFS. But when you can't find it there, you can find it here.

Diver's Den

This is the "what-you-see-is-what-you-get" section of Live Aquaria and it's the only online source for livestock that I have ever used. Do not confuse it with ordering from Live Aquaria itself. They don't have the same quality or guarantees. Diver's Den is its own facility operated by renowned aquarist Kevin Cohen. They are universally considered the best in the business. I'm on their email list so I get a daily update of the items posted.

Well, that's about the size of it. These are tried and true resources for a great number of aquarists. I hope you'll post more great resources in the comments. Thanks for reading and have a wet day!

-Paul